Friday, May 20, 2011

Here Fishie, Fishie, Fishie

The fish and everything was done in Illustrator.
I drew the fish with the pen tool.
I select on the fish drawn and insert the Yellow, Orange, Red color.
Afterward, I went to: Effect, Stylize ---> Scribble
I added the blue strip of line.

After this process, I went to Adobe Photoshop.


I add in the two texture to the photo:

The bottom texture, I put to overlay with 35% opacity
The top texture, I put on top of the bottom texture and put it to overlay with 100% opacity.
The outcome comes out to be like this:


Afterward, I add in a cat photo:
I clone stamp on the word at the bottom right.
Then I put the photo on top of the fish and put soft light to 65% opacity.
After that, I add in type.
My final result:

Live Trace

I used the image below in Illustrator:


I use live trace and then live trace and color with live paint bucket


I went to Photoshop and add in rose on her hand.

Screenshot:

A mini pinic


Image used :


I decide to do something that is related to one of my favorite childhood story "The Little Red Riding Hood" Even though there is no wolf but there is cupcake.

First I use quick selection tool and cut the main picture that I want from the picture.

Second, I insert this pretty background for my work:
Third, I put picture together in this background, I clip the image and I adjust the exposure and photo filer so the picture could be more of the scenery color. I also added drop shadow for a more 3D effect.

My final result:
This is a simple design because I think adding more will ruin the surrounding of the forest.

Screen shot:

Friday, March 18, 2011

Texture Work.

I make this work basically using texture on a girl and then I smudge away the hard edges.

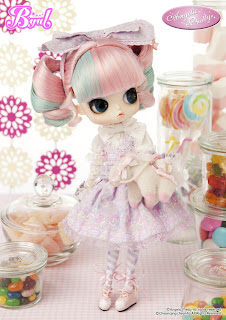
1) I start off using this picture.

http://www.wincciwincci.com/popteen_200704_008.jpg

2) I turn the picture of the girl into threshold from the adjustment layer.
3) I added this texture on top of the girl.
http://fc09.deviantart.net/fs22/f/2007/328/6/8/Wallpaper_texture_by_spikesbint.jpg

4) I put the pattern to linear burn with 100% opacity
5) I set the girl to 70% opacity so you an see some color from the original picture but not too much.
6) I went to layer properties and put pattern overlay and chose a pattern that I believe will suit the image.
 7) I also added this pattern on the top of the image:
http://mkrundle.files.wordpress.com/2011/02/glitter_glow_texture_i_by_hauntingmewithstock.jpg
8) I put this into lighten with 10% opacity.
9) After I lighten I make a new layer and try to make her lip a bit more pink. Blending mode: Color with 60% opacity.
10) Afterward, I want to get rid of the harsh black spotted edge that threshold was giving me, so I use the smudge tool and smudge out some part.

Overall look of my layers:

11) My result turn out to be like this:

Lost Eggs.

This is more of a fun like project that I did using clipping path and masking.

First I cut off the bowl with eggs from this picture.
http://10thirty.files.wordpress.com/2008/02/eggs.jpg


Secondly, I use this grass picture for the background.
http://uticarugby.com/images/grass-texture.jpg?1258577391 

Third, I drew the picture of faces in the egg, I adjust some of the leveling. I also clip mask the bowl with eggs with a white background color to make only the bowl with eggs brighter.

This is my outcome.

Thursday, March 17, 2011

>__>...Portrait Book.

It so awkward feeling to do self portrait project but here it goes:

A picture of me: 

1)  A book that I found in google. I cut it out from the original photo using selection tool and cut.
http://www.stoic.biz/DutchUncle/DutchUncleGraphics/book_open-1.jpg 


A picture that was shot during my trip to Aruba.

2) Then I choose one of the water picture that I took from one of my trip in Aruba. 
3) I also lasso tool out my picture, it a hard way to cut out the picture but it was worth a try.
4) I change the color of the water picture into more blue
5) I put the book on top of the water and overlay
6) I put my picture on top of the book and gray scale it
                    7) Lastly I added some circle on my head as panda ears, ribbon and music note.
The result turn out to be:

Thursday, February 24, 2011

Quick Selection Work.

 We did a quick selection work in class today and I made these by cutting them off from the original background, and refine them. Afterward I put them with a background.


From these picture:


To these: 


Picture reference are taken from:
1st Photo : Here
2nd Photo: Here

Texture/Bg Picture are taken from:
1st Photo Texture: Here
2nd Photo Texture: Here